Every site can expose its files over SFTP for direct edits and uploads — enabled per environment, isolated, and locked down by default. Here's how it works and how to connect.
Belov Cloud gives you direct file access to your site over SFTP — secure file transfer tunneled through SSH. Each environment gets its own isolated account: live and staging are completely separate logins, so a staging credential can never touch production. The account is chrooted (locked) to that one environment's files — it can't see your other sites or the rest of the server — and it listens on a non-standard port, which cuts out most automated login attempts.
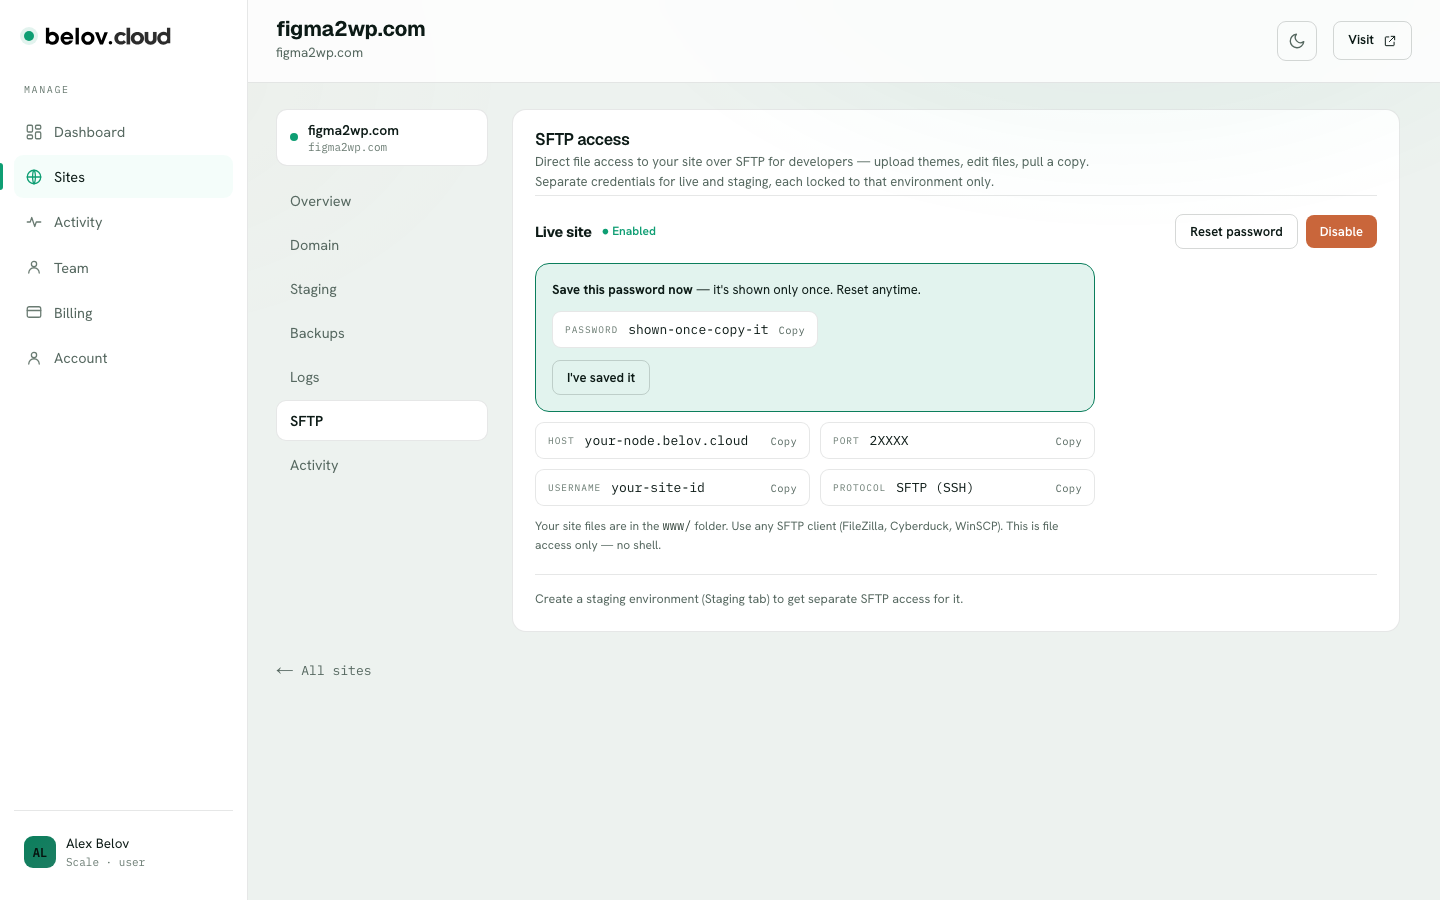
The SFTP tab — enable per environment, then copy the host, port, username, and one-time password.
1
Open the SFTP tab and pick an environment
On the site, go to SFTP. Live and staging each have their own toggle — enabling one has no effect on the other.
2
Click Enable
Belov Cloud creates an isolated account for that environment and shows you the connection details: host, the non-standard port, and username.
3
Copy the password — it's shown once
For security the password appears a single time, right after you enable. Save it to your password manager immediately, because it won't be shown again.
4
Connect with any SFTP client
Point a client like FileZilla, Cyberduck, or Transmit at the host and the exact port shown, using the username and one-time password. You'll land directly in your site's files.
5
Repeat for staging if you need it
Staging is a separate account with its own host, port, and password — enable it the same way when you want to edit the staging copy.
File transfer, not a shell
This is SFTP over SSH — encrypted transfer for uploading, downloading, and editing files. It is not an interactive shell: there's no command line and no running commands on the server. To change code, edit the files and upload them. For a safe place to test those edits before they hit production, use the staging environment and push to live when it checks out.